Creating a Product
Now you've added your suppliers it's time to add your products.
To add a product manually to your inventory, click on the Home Page.
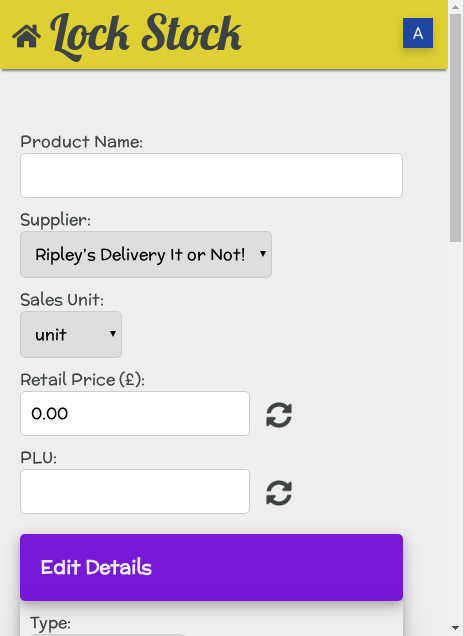
It will take you to another page which will look like this:

Fill in the information for the product you wish to add. This page will be referred to as a Products Information page in the manual.
Below is an explanation for each section on the form.
- Product Name - A name that you and your staff will recognise the product by.
- Supplier - The supplier that provides the Product.
- Sales Unit - The unit by which the Product is sold/consumed/stock checked. You can select a unit from the drop down menu or define a custom unit instead. Choosing "Custom" will create a new box where you can manually enter whatever unit type you require.
- Retail Price - The price a customer is charged when purchasing this Product. Click
 to create a retail price for you based on parameters you can set elsewhere.
 - PLU - Here you can input the price look up code. Click
 to automatically generate the next available PLU code.
Open this tab to add details about the product.
- Type - Assign this product one of the Product Types that you have defined.
- Description - Any notes about the product which are relevant to you and your business.
- Purchase Unit - The units the Product is purchased in. For example biros might be delivered in a box of 20 but you may sell them by the pen. In this case the unit would be box.
- Unit ratio - The number of Retail Units contained in each Purchase Unit. Carrying on from the previous example it would be 20.
- Cost Price (£) - This is the amout you pay per purchase unit. This data can be used by Lock Stock to caculate useful information.
- Minimum Level - Define a number of Retail Units for a Product which you would consider that you're officially "running low" on this item and should order more. Lock Stock can be configured to send you an email to inform you when this threshhold has been crossed. A minimum stock level can be defined for each department. For example you could set the warning to activate when the stock falls below 100 in your stock room, and for the warning to activate when stock falls below 20 on the shop floor. Click
 to be taken to another page where each department that you created will be listed.
 - Supplier code - A code that identifies this products supplier.
- VATable - Is this product subject to VAT?
- Obsolete - Mark this Product as obsolete. It's movement data will be preserved but it will not show up in Product searches.
- Barcode - The Product barcode. Use to add/update the product's barcode.
- QR Code - Creates a 2D barcode for the product you're creating or for one you created previously. When scanned this barcode will take directly to the product page. You can print out the barcode and attach it to a product's shelf or somewhere else convenient, and then scan it whilst stock taking to avoid having to search for the product manually.
On the same page there's another tab named addition information. Click it to open it. The information here is for reference only and cannot be edited here.
- Mark Up - The markup on this product based on the Cost Price, Retail Price and Unit Ratio.
- Unit Cost Price - This is the cost price for a Retail Unit.
- Staff Price - The price available to staff as calculated using the Staff Price Calculator in the section. Clicking
 will prompt you to create a Staff Sale movement directly.
Stock Check
This section allows you to quickly update the amount of a Product observed during a physical stock take. Your nominated personal department will always be at the top with other departments below.
Departments, other than your Personal Department, are hidden if they have zero recorded stock. This feature can be toggled by clicking .
Additional Buttons
At the bottom of the page you will see some buttons which have various functions and lead to other pages. Let's take a look at what they do.
- - This will take you to a page to order more of the product.
- - Removes the created product.
- - This will duplicate the product and information you just created.
- - Click this when you want to submit and save the data you've just entered.
- - Click this to bring up a changelog showing when and by who the product information page was edited.
- - This is found right at the bottom of the page and will simply take you back to the top of the page.